Your browser version is too low, it may lead to sites not normally access!
You can use the site to function properly, use these browsers.
Your browser version is too low, it may lead to sites not normally access!
You can use the site to function properly, use these browsers.
I. How to adjust the level of the level
Take one side of the debugging method, because both sides have a fixed screw, one end can play the role of fixed, one end can play the role of adjustment. We can use a special screwdriver to adjust both sides before and after, until the level bubble is located in the middle of the position, and then tighten the screw until qualified.
II. What is the level ruler
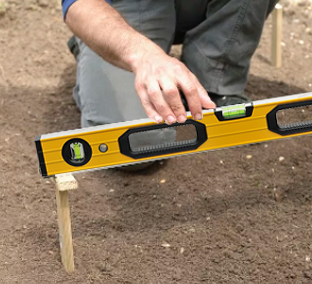
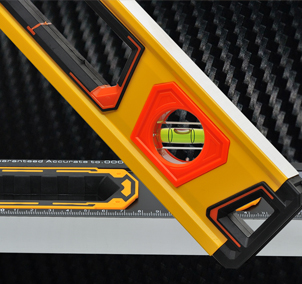
1. We can see that there are 3 tubes on the top of the level ruler, and there is a bubble in each tube, professionally called level bubble. The two sides are the shockproof end, if this bubble is in the middle of the position, it shows that it is level. If there is a problem of unevenness, which side is biased, it indicates which side is high.
2. Before using, you need to do leveling work on the leveling scale. Put it on a stable flat plate, wait until it is stable, one end reading should be 0, then adjust the level to 180 degrees, put it in the original position, and then read the data after it is stable.
III. If use the level meter correctly
1. Before each use, you should calibrate and calibrate the level, put it on the flat wall, then draw a line, and put the left and right ends of the level to the line you originally drew. If you can overlap, it means that it is still flat, so as to ensure that the measured data is also accurate.
2. We need to use it when testing whether the wall is flat, it is capable of both short-distance measurement and long-distance measurement, relatively speaking, the accuracy is still relatively high.
3. Before using it, you also need to detect whether there are any cracks and air holes, and put the level on the object to be measured to observe the bubbles. If it is biased to which side, it means that side is a little higher, you can slightly reduce the height of this side. If the bubble is in the center, it means that this direction is horizontal.